Ariel Salaverria Custom Knives Ariel Salaverria Custom Knives - San Mai and Cable Damascus Custom Knives - Knifemaking Tutorials
    Home | About Me | Tutorials | Knifemaking | Ordering | Contact | Newsletter  
  Available | Knives | Jewelry | EDC Tools | Lanyard Beads | Watch Buckles and Straps | Rings | Crosses | Hearts  
#23 - #22 - #21 - #20 - #19 - #18 - #17 - #16 - #15 - #14 - #13 - #12 - #11 - #10 - #9 - #8 - #7 - #6 - #5 - #4 - #3 - #2 - #1
 
#27 - #26 - #25 - #24
 

Knifemaking - Japanese San Mai Tanto - Blade
Japanese traditional tanto in san mai damascus (1070 and 52100 from a motorcycle distribution chain, with a W1 core)

Blade Details:
-7.45" blade, 13" overall lenght.

Blade making process
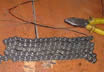
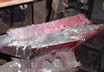
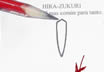
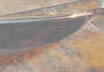
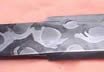
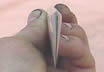
Starting from a motorcycle chain, I tied it into a little package before putting it on the oven. (Picture 1)

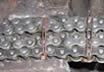
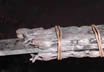
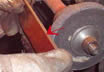
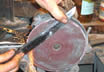
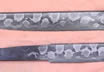
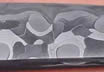
Once I had the chain tightened and tied up, I welded it to a steel bar (electric) and once that was finished, it was ready to go into the oven for a first heat. (Picture 2)

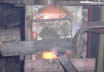
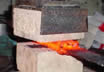
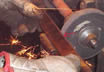
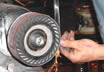
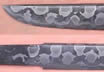
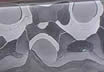
Once the chain got properly heated, I took it out of the oven and put some flux on it. I used borax on it (the smoke is because I also added 10% of Sal Ammoniac (Ammonium Chloride) to get less oxides in the weld. (Picture 3)

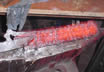
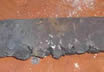
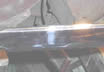
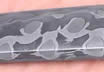
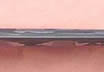
Once I placed the flux on the steel, it went back into the oven til the borax started to boil. (Picture 4)

Once the borax boiled, I took the steel brick out of the oven and started hitting it with a hammer. You must start with soft hits and then increase the strenght. (Picture 5)

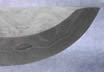
After a session of hammering, I got the chain finally forged and ready for the next step. (Picture 6)

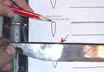
I let the forged chain cool off, and then cutted it in two pieces to tie them up with the W1 in the middle. After I added the flux again and heated it on the oven, I was ready to weld it on the press. (Picture 7)

I welded the steels on the hydraulic press (it took me 3-4 seconds). I could have done it with a heavy hammer, but I wanted to test my new press. (Picture 8)

Tutorial Ball Bearings Damascus   Tutorial Ball Bearings Damascus   Tutorial Ball Bearings Damascus   Tutorial Ball Bearings Damascus   Tutorial Ball Bearings Damascus   Tutorial Ball Bearings Damascus   Tutorial Ball Bearings Damascus   Tutorial Ball Bearings Damascus
Picture 1   Picture 2   Picture 3   Picture 4   Picture 5   Picture 6   Picture 7   Picture 8

After the welding on the press, I started hammering the steel to transform it from a brick into something I could use to make a blade. Once it got cold, I weighted it... A good half kilo. (Picture 9)

Working with that piece on the grinder, I removed some metal and ground the tip of the blade to show the composition of the steel. You can apreciate the chain on the laterals and the W1 apearing in the middle to form the edge. After tempering and acid etching, the contrast is better. (Pictures 10 and 11)

At this point the blade is ready for me to keep grinding it to final shape, continuing that grind to the other end, eliminating the imperfections from the forging process.

I decided to ground the spine into the Hira-Zukuri blade style. Here I am grinding the upper bevel. (Pictures 12, 13, 14 and 15)

Grinding the blade to a zero grind, horozontally. (Picture 16)

Tutorial Ball Bearings Damascus   Tutorial Ball Bearings Damascus   Tutorial Ball Bearings Damascus   Tutorial Ball Bearings Damascus   Tutorial Ball Bearings Damascus   Tutorial Ball Bearings Damascus   Tutorial Ball Bearings Damascus   Tutorial Ball Bearings Damascus
Picture 9   Picture 10   Picture 11   Picture 12   Picture 13   Picture 14   Picture 15   Picture 16

Grinding the blade to a zero grind, vertically. (Picture 16)

Ground blade, still no etching. (Pictures 18 and 19)

Tutorial Ball Bearings Damascus   Tutorial Ball Bearings Damascus   Tutorial Ball Bearings Damascus   blank image   blank image   blank image   blank image   blank image
Picture 17   Picture 18   Picture 19                    
Finished Blade
Tutorial Ball Bearings Damascus   Tutorial Ball Bearings Damascus   Tutorial Ball Bearings Damascus   Tutorial Ball Bearings Damascus   Tutorial Ball Bearings Damascus   Tutorial Ball Bearings Damascus   Tutorial Ball Bearings Damascus   Tutorial Ball Bearings Damascus
Tutorial Ball Bearings Damascus   blank image   blank image   blank image   blank image   blank image   blank image   blank image
#23 - #22 - #21 - #20 - #19 - #18 - #17 - #16 - #15 - #14 - #13 - #12 - #11 - #10 - #9 - #8 - #7 - #6 - #5 - #4 - #3 - #2 - #1
 
#27 - #26 - #25 - #24
 
  Available | Knives | Jewelry | EDC Tools | Lanyard Beads | Watch Buckles and Straps | Rings | Crosses | Hearts  
    Home | About Me | Tutorials | Knifemaking | Ordering | Contact | Newsletter  
Subscribe to the Ariel Salaverria Custom Knives Newsletter AES Custom Knives - Copyright 2004-2022 - Website by NsB