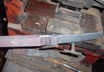
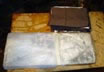
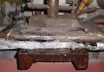
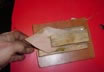
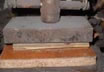
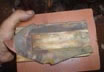
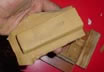
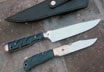
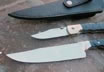
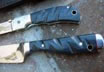
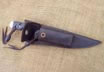
Ariel Salaverria Custom Knives Ariel Salaverria Custom Knives - San Mai and Cable Damascus Custom Knives - Knifemaking Tutorials
    Home | About Me | Tutorials | Knifemaking | Ordering | Contact | Newsletter  
  Available | Knives | Jewelry | EDC Tools | Lanyard Beads | Watch Buckles and Straps | Rings | Crosses | Hearts  
#23 - #22 - #21 - #20 - #19 - #18 - #17 - #16 - #15 - #14 - #13 - #12 - #11 - #10 - #9 - #8 - #7 - #6 - #5 - #4 - #3 - #2 - #1
 
#27 - #26 - #25 - #24
 

Knifemaking - O1 Integral and Sheath
This is the fixed blade part of a fixed blade and folder collaboration with Ruben Calo.

Order Details:
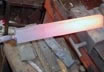
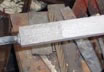
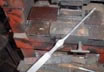
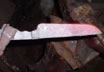
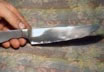
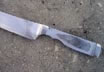
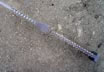
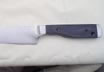
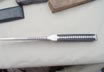
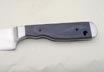
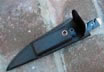
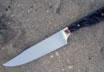
-Forged integral in O1.
-Clip point, mirror finish, differentially hardened.
-5" blade, 9 1/2" overall length.
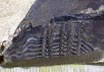
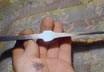
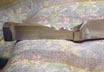
-Black/grey/brown layered micarta with red spacers.
-2 mosaic pins.
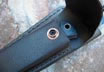
-Nickel silver lanyard hole.
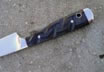
-Filework on blade spine, top of handle and around pommel.
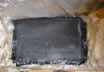
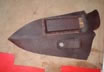
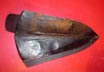
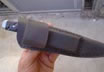
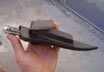
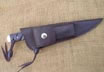
-Sheath in brown leather. Pouch style for fixed blade with snap tab sheath on front for the folder.

Knife making process
Heating the O1 barstock. (Picture 1)

Flattening the barstock with the press. (Pictures 2, 3, 4, 5, 6, 7 and 8)
Knifemaking - O1 Integral and Sheath   Knifemaking - O1 Integral and Sheath   Knifemaking - O1 Integral and Sheath   Knifemaking - O1 Integral and Sheath   Knifemaking - O1 Integral and Sheath   Knifemaking - O1 Integral and Sheath   Knifemaking - O1 Integral and Sheath   Knifemaking - O1 Integral and Sheath
Picture 1   Picture 2   Picture 3   Picture 4   Picture 5   Picture 6   Picture 7   Picture 8
Making the integral bolster and handles. (Pictures 9, 10, 11 and 12)

Press forged to rough shape. (Picture 13)

For this order, our customer asked for a black/brown and grey micarta, but many times when you use this process to make it, you end up with darker or changed colors due to the different resing impregnation on the used clothings/materials.

For this reason is that in this case I replaced the grey clothings for another element, that turned out grey on the final piece. This new element is no other than common rolled white kitchen paper, that due to the resin impregnation -as just explained- turns out grey. Had I used grey clothings, it would ended up really darker, and there wouldn't be any real contrast between the different layers of colors.

Pieces of cloth already cutted and piles, ready for the resin. for this particular project I've used 60 pieces in total. (Picture 14)

Placing the resin on each group of clothings/paper. (Picture 15)

Placing two wooden boards protected with plastic bags to avoid the mix getting glued to them, I get them on a manual press. (Picture 16)
Knifemaking - O1 Integral and Sheath   Knifemaking - O1 Integral and Sheath   Knifemaking - O1 Integral and Sheath   Knifemaking - O1 Integral and Sheath   Knifemaking - O1 Integral and Sheath   Knifemaking - O1 Integral and Sheath   Knifemaking - O1 Integral and Sheath   Knifemaking - O1 Integral and Sheath
Picture 9   Picture 10   Picture 11   Picture 12   Picture 13   Picture 14   Picture 15   Picture 16
I use "just" 5 tons for this. (Picture 17)

Once I remove it from the press and boards. (Picture 18)

Cutting a piece of the dried up mix to test patterns. (Picture 19)
A little bit more of press forging. (Picture 20)

Edge and point of the knife are done by hammering, not press. (Picture 21 and 22)

Forged to shape. (Picture 23)

Roughly ground. (Picture 24)
Knifemaking - O1 Integral and Sheath   Knifemaking - O1 Integral and Sheath   Knifemaking - O1 Integral and Sheath   Knifemaking - O1 Integral and Sheath   Knifemaking - O1 Integral and Sheath   Knifemaking - O1 Integral and Sheath   Knifemaking - O1 Integral and Sheath   Knifemaking - O1 Integral and Sheath
Picture 17   Picture 18   Picture 19   Picture 20   Picture 21   Picture 22   Picture 23   Picture 24
Integral bolsters. (Pictures 25 and 26)

Working with a file to get the final fit. (Picture 27)

Once Ruben did the filework, it's ready to get the handle slabs. (Pictures 28 and 29)

Almost done, I just have to flute the handle slabs, add the pins and lanyard hole nickel silver tubing to match the folder and polish it. (Pictures 30, 31 and 32)
Knifemaking - O1 Integral and Sheath   Knifemaking - O1 Integral and Sheath   Knifemaking - O1 Integral and Sheath   Knifemaking - O1 Integral and Sheath   Knifemaking - O1 Integral and Sheath   Knifemaking - O1 Integral and Sheath   Knifemaking - O1 Integral and Sheath   Knifemaking - O1 Integral and Sheath
Picture 25   Picture 26   Picture 27   Picture 28   Picture 29   Picture 30   Picture 31   Picture 32
Sheath making process
The most important part here is the pouch that will host the folder, so for that I've made a mold in wood, to be able to shape the leather properly. (Pictures 33 and 34)

Then I press it using about 3-4 tons. (Picture 35)

Here you can see how the molded leather looks like. (Pictures 36 and 37)

Then I glue another leather piece to the rear part that folds over the opening to serve as closing lid of the pouch. (Picture 38)

After dyeing the leather brown, I use a piece of leather with no texture for the inner linning of the sheath. (Picture 39)

Then I glue the spine of the leather to protect the stitchings. (Picture 40)
Knifemaking - O1 Integral and Sheath   Knifemaking - O1 Integral and Sheath   Knifemaking - O1 Integral and Sheath   Knifemaking - O1 Integral and Sheath   Knifemaking - O1 Integral and Sheath   Knifemaking - O1 Integral and Sheath   Knifemaking - O1 Integral and Sheath   Knifemaking - O1 Integral and Sheath
Picture 33   Picture 34   Picture 35   Picture 36   Picture 37   Picture 38   Picture 39   Picture 40
And finally we get the almost done sheath, just missing the lock from the pouch. (Pictures 41, 42, 43 and 44)
Knifemaking - O1 Integral and Sheath   Knifemaking - O1 Integral and Sheath   Knifemaking - O1 Integral and Sheath   Knifemaking - O1 Integral and Sheath   blank image   blank image   blank image   blank image
Picture 41   Picture 42   Picture 43   Picture 44                
Finished Knife and Sheath
Knifemaking - O1 Integral and Sheath   Knifemaking - O1 Integral and Sheath   Knifemaking - O1 Integral and Sheath   Knifemaking - O1 Integral and Sheath   Knifemaking - O1 Integral and Sheath   Knifemaking - O1 Integral and Sheath   Knifemaking - O1 Integral and Sheath   Knifemaking - O1 Integral and Sheath
Knifemaking - O1 Integral and Sheath   Knifemaking - O1 Integral and Sheath   blank image   blank image   blank image   blank image   blank image   blank image
#23 - #22 - #21 - #20 - #19 - #18 - #17 - #16 - #15 - #14 - #13 - #12 - #11 - #10 - #9 - #8 - #7 - #6 - #5 - #4 - #3 - #2 - #1
 
#27 - #26 - #25 - #24
 
  Available | Knives | Jewelry | EDC Tools | Lanyard Beads | Watch Buckles and Straps | Rings | Crosses | Hearts  
    Home | About Me | Tutorials | Knifemaking | Ordering | Contact | Newsletter  
Subscribe to the Ariel Salaverria Custom Knives Newsletter AES Custom Knives - Copyright 2004-2022 - Website by NsB