|
Knifemaking - Damascus
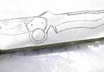
Ringed Fighter
A big san mai damascus ringed fighter with sheep horn handle for
a previous customer. |
Order Details:
In addition of the sketch of the knife the customer sent me, we
arranged the following:
- 3/16" thick blade of a San Mai damascus with O1 in the middle.
- Coppered damascus bolsters.
- 1/8" thick sheep stag handle slabs.
- 1" diameter forefinger ring. |
Knife making process
This is the sketch of the knife the customer sent me. (Picture
1)
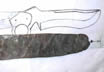
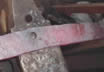
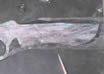
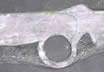
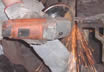
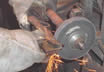
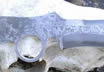
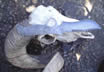
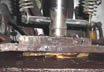
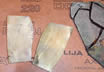
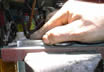
I prepared three damascus billets to test a drop hammer a fellow
knifemaker built. I also wanted to see if I could get some extra help
on this damascus. This knife's billet is the one next to the hammer
on the firt picture and the bottom one on the second. (Pictures
2 and 3)
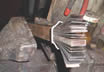
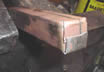
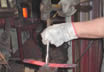
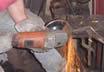
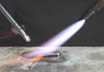
Placing the billet on the oven and hammering it a bit. (Pictures
4, 5 and 6)
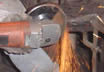
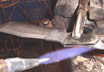
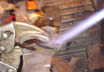
Testing the drop hammer. (Pictures 7, 8, 9, 10 and 11) |
| Picture 1 |
|
Picture 2 |
|
Picture 3 |
|
Picture 4 |
|
Picture 5 |
|
Picture 6 |
|
Picture 7 |
|
Picture 8 |
Testing the drop hammer. (Pictures 7, 8, 9, 10
and 11)
The drop hammer didn't have enough weight installed to hammer
strong enough, but I managed to get the billet a little longuer.
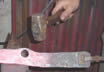
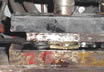
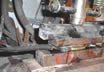
In the middle of the forging the billet started to get loose from
the supporting bar from the heat and hammering, so I had to reinforce
the welding. (Pictures 12, 13, 14, 15 and 16) |
| Picture 9 |
|
Picture 10 |
|
Picture 11 |
|
Picture 12 |
|
Picture 13 |
|
Picture 14 |
|
Picture 15 |
|
Picture 16 |
I kept on forging the next day at my workshop, and
just to show that this is not an exact science, after hammering the
billet, I discovered it was a bit shorter than what I needed, so I
needed to forge a new billet. (Pictures 17 and 18)
This is the making of the canister with the different steels inside
to place later in the oven to heat it and then forge it. It has O1
in the center, and layers of 1010 and 1070 surrounding it. (Pictures
19, 20, 21 and 22)
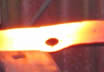
This is how I made the hole on the steel and then hammer it to accomodate
it to the right position. (Pictures 23, 24, 25, 26 and 27) |
| Picture 17 |
|
Picture 18 |
|
Picture 19 |
|
Picture 20 |
|
Picture 21 |
|
Picture 22 |
|
Picture 23 |
|
Picture 24 |
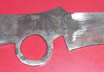
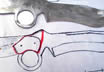
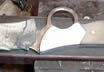
After I had the holes and flatened steel, I cutted
a stencil in paper, a little bigger than the knife so I had some room
later for the grinding stage and glued it to the steel with contact
cement. (Picture 28)
On this detail, you can see the stencil hole matches the steel hole.
(Picture 29)
I don't use laser or plasma cutters or saws, so I modeled the
steel bar into shape with a hand grinder. (Pictures 30, 31 and
32) |
| Picture 25 |
|
Picture 26 |
|
Picture 27 |
|
Picture 28 |
|
Picture 29 |
|
Picture 30 |
|
Picture 31 |
|
Picture 32 |
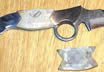
After I finished that, the steel had the proper shape,
but still very rough. (Picture 33)
Smoothing it with a bench grinder. (Picture 34)
Knife blank. (Pictures 35 and 36)
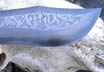
Grinding lines (Those curves were really hard to make) and my sugestion
for the customer: the front bolster should be bigger, to provide a
better finger rest with a firmer grip. (Picture 37)
This was the hardest knife to grind I have ever make, and I'm really
proud of how it turned out. I made some bevels wider than on the original
design to show the damascus and O1 patterns better. (Pictures
38, 39, 40, 41, 42 and 43) |
| Picture 33 |
|
Picture 34 |
|
Picture 35 |
|
Picture 36 |
|
Picture 37 |
|
Picture 38 |
|
Picture 39 |
|
Picture 40 |
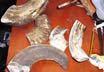
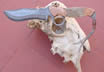
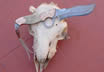
Here's how I prepared the sheep stag to be used on
the knife.
First I cutted the stag in 3 parts so I could place it on a pot. (Picture
44)
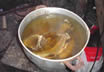
I boiled the pieces of stag so they become elastic. (Picture 45)
Right after the boiling bath, ready to be flattened. (Picture
46)
On the horizontal press. (Picture 47)
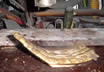
Flattened stag, already marked with the aproximate shape of the handle
slabs to be cutted. (Picture 48) |
| Picture 41 |
|
Picture 42 |
|
Picture 43 |
|
Picture 44 |
|
Picture 45 |
|
Picture 46 |
|
Picture 47 |
|
Picture 48 |
Cutted slabs and damascus steel marked for the bolsters.
(Pictures 49 and 50)
In order to secure the bolsters and not use screws or pins (which
I don't like on fixed blade's bolsters) I use a tin alloy bar to add
a film to the back of the bolster so I can weld it later to the knife.
(Picture 51)
Same treatment on the knife. (Picture 52)
Then I pressed both pieces in position and then heated it with
a torch to the melting point of the alloy (aprox 270 C)
When it colds, the welding is perfect, so I can take it off the grip.
(Pictures 53 and 54)
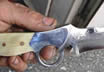
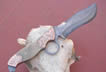
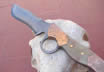
This is how I secure the scales on knives so I don't rely only on
the pins/screws. Placing the scales on place to test the fit (check
out the oversized slabs so I have extra room to polish it properly
later) The blade isn't coppered, just looks that way because of the
lightning. (Picture 55)
Putting poliester resin on the back of the scale. (Picture
56) |
| Picture 49 |
|
Picture 50 |
|
Picture 51 |
|
Picture 52 |
|
Picture 53 |
|
Picture 54 |
|
Picture 55 |
|
Picture 56 |
On the press for a proper glueing. (Pictures 57
and 58)
Sanding the bolsters and slabs. (Pictures 59 and 60)
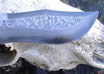
Almost ready to place it again in acid, to get the pattern on the
bolsters and a little more etching in the blade.
All the drawings are a long process, as I have to protect this parts
now for the acid, and later to copper just the bolsters I have to
protect the slabs again and the blade and spine on the handle so that
doesn't get coppered too. The knife is still missing the thumb serrations.
(Picture 61)
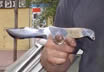
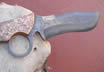
Showing the point of balance. (Picture 62)
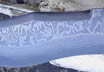
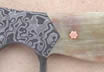
A preview of the just etched bolsters before coppering them. Instead
of screws, I used 7 copper pins to secure the slabs to match the coppered
bolsters. (Picture 63) |
| Picture 57 |
|
Picture 58 |
|
Picture 59 |
|
Picture 60 |
|
Picture 61 |
|
Picture 62 |
|
Picture 63 |
|
|
|