Ariel Salaverria Custom Knives Ariel Salaverria Custom Knives - San Mai and Cable Damascus Custom Knives - Knifemaking Tutorials
    Home | About Me | Tutorials | Knifemaking | Ordering | Contact | Newsletter  
  Available | Knives | Jewelry | EDC Tools | Lanyard Beads | Watch Buckles and Straps | Rings | Crosses | Hearts  
#23 - #22 - #21 - #20 - #19 - #18 - #17 - #16 - #15 - #14 - #13 - #12 - #11 - #10 - #9 - #8 - #7 - #6 - #5 - #4 - #3 - #2 - #1
 
#27 - #26 - #25 - #24
 

Knifemaking - Japanese San Mai Tanto - Wooden Sheath
Lacquered wooden sheath for the Japanese San Mai Tanto.

Sheath Details:
Aerographed, lacquered and polished wooden sheath for the tanto.

Wooden sheath making process
Two pieces of African Padauk (9" x 2 1/2" x 1/2") to start working on the handle. (Picture 1)

Marking the contour of the blade with a pen. (Picture 2)

Marked pieces. (Picture 3)

Milling the space for the blade. I don't have a milling machine so I move the piece myself. The depth of the milling is half of the blade width for each wooden side. (Pictures 4 and 5)

Finishing with a file. (Picture 6)

Checking the exact fitting. (Pictures 7 and 8)

Knifemaking - Japanese San Mai Tanto - Wooden Sheath   Knifemaking - Japanese San Mai Tanto - Wooden Sheath   Knifemaking - Japanese San Mai Tanto - Wooden Sheath   Knifemaking - Japanese San Mai Tanto - Wooden Sheath   Knifemaking - Japanese San Mai Tanto - Wooden Sheath   Knifemaking - Japanese San Mai Tanto - Wooden Sheath   Knifemaking - Japanese San Mai Tanto - Wooden Sheath   Knifemaking - Japanese San Mai Tanto - Wooden Sheath
Picture 1   Picture 2   Picture 3   Picture 4   Picture 5   Picture 6   Picture 7   Picture 8

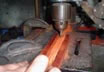
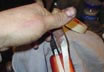
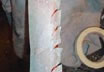
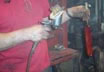
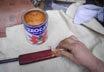
Making some 2mm holes (1/4" depth) to later put some wooden pegs there to keep the halves together. (Picture 9)

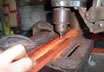
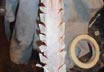
Putting the wooden pegs. (Picture 10)

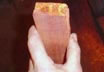
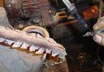
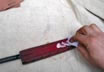
One half already done, ready to be glued to the other. (Picture 11)

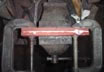
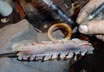
Pressing both pieces together for a perfect match for the glueing. (Picture 12)

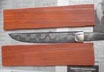
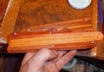
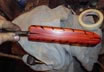
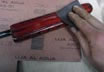
Sheath already shaped after grinding, sanded and ready for the laquering process. (Picture 13)

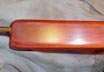
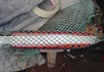
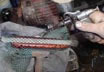
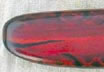
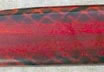
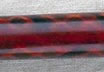
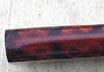
Using masking tape to make some decorative patterns. (Pictures 14, 15, 16 and 17)

Knifemaking - Japanese San Mai Tanto - Wooden Sheath   Knifemaking - Japanese San Mai Tanto - Wooden Sheath   Knifemaking - Japanese San Mai Tanto - Wooden Sheath   Knifemaking - Japanese San Mai Tanto - Wooden Sheath   Knifemaking - Japanese San Mai Tanto - Wooden Sheath   Knifemaking - Japanese San Mai Tanto - Wooden Sheath   Knifemaking - Japanese San Mai Tanto - Wooden Sheath   Knifemaking - Japanese San Mai Tanto - Wooden Sheath
Picture 9   Picture 10   Picture 11   Picture 12   Picture 13   Picture 14   Picture 15   Picture 16

Applying black lacquer with an aerograph. (Pictures 18 and 19)

After removing the masking tape, the first lacquering stage is completed. (Picture 20)

For the second lacquering stage instead of masking tape, I use a plastic net from a big bag of potatoes. (Pictures 21 and 22)

Second lacquering stage completed. (Picture 23)

I apply 6 layers of transparent poliuretanic lacquer. After each layer I let it dry before applying the second one. Every two layers, I sand it with a 400 grit sandpaper. (Picture 24)

Knifemaking - Japanese San Mai Tanto - Wooden Sheath   Knifemaking - Japanese San Mai Tanto - Wooden Sheath   Knifemaking - Japanese San Mai Tanto - Wooden Sheath   Knifemaking - Japanese San Mai Tanto - Wooden Sheath   Knifemaking - Japanese San Mai Tanto - Wooden Sheath   Knifemaking - Japanese San Mai Tanto - Wooden Sheath   Knifemaking - Japanese San Mai Tanto - Wooden Sheath   Knifemaking - Japanese San Mai Tanto - Wooden Sheath
Picture 17   Picture 18   Picture 19   Picture 20   Picture 21   Picture 22   Picture 23   Picture 24

After letting it dry for two more days, I sand it with a 600 grit sandpaper and water. (Picture 25)

Polishing it with an coarse lacquer polishing paste (same as you'd use on a car) with a cotton cloth til it gets shiny and glossy. (Picture 26)

Polishing it again with a thinner lacquer polishing paste, again with a cotton cloth, this time in circles, until the sheath shines even more. (Picture 27)

Knifemaking - Japanese San Mai Tanto - Wooden Sheath   Knifemaking - Japanese San Mai Tanto - Wooden Sheath   Knifemaking - Japanese San Mai Tanto - Wooden Sheath   blank image   blank image   blank image   blank image   blank image
Picture 25   Picture 26   Picture 27                    
Finished Sheath
Knifemaking - Japanese San Mai Tanto - Wooden Sheath   Knifemaking - Japanese San Mai Tanto - Wooden Sheath   Knifemaking - Japanese San Mai Tanto - Wooden Sheath   Knifemaking - Japanese San Mai Tanto - Wooden Sheath   blank image   blank image   blank image   blank image
#23 - #22 - #21 - #20 - #19 - #18 - #17 - #16 - #15 - #14 - #13 - #12 - #11 - #10 - #9 - #8 - #7 - #6 - #5 - #4 - #3 - #2 - #1
 
#27 - #26 - #25 - #24
 
  Available | Knives | Jewelry | EDC Tools | Lanyard Beads | Watch Buckles and Straps | Rings | Crosses | Hearts  
    Home | About Me | Tutorials | Knifemaking | Ordering | Contact | Newsletter  
Subscribe to the Ariel Salaverria Custom Knives Newsletter AES Custom Knives - Copyright 2004-2022 - Website by NsB