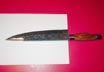
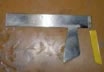
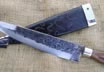
Knifemaking - Criollo
Knife Leather Sheath
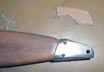
A traditional style criollo sheath.
Order Details:
-Traditional style criollo leather sheath with some decorations.
Sheath making process
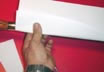
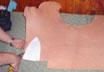
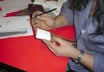
Making a mold out of paper according to the blade's shape. (Pictures
1 and 2)
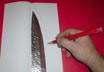
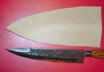
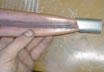
I draw the contour of the blade taking into consideration the extra
material for the stitching and the thickness of the leather. (Picture
3)
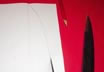
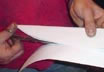
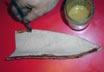
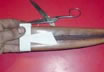
Cutting the drawn mold with scissors. (Pictures 4, 5 and 6)
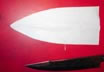
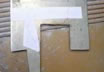
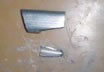
Finished paper mold. (Picture 7)
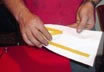
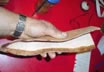
I place double glue tape to get the leather to stick and be able
to cut the contour of the paper mold. (Picture 8)
Picture 1
Picture 2
Picture 3
Picture 4
Picture 5
Picture 6
Picture 7
Picture 8
Cutting the leather piece out
of a sheath sheet. (Picture 9)
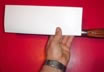
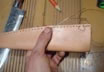
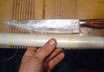
Final sheath piece. (Picture 10)
I put glue and then glue the leather together. (Pictures 11,
12 and 13)
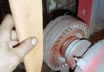
I smooth the contour on the band sander. (Pictures 14)
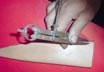
I use a compass to draw a line parallel to the border (4mm) (Pictures
15 and 16)
Picture 9
Picture 10
Picture 11
Picture 12
Picture 13
Picture 14
Picture 15
Picture 16
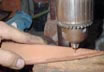
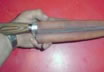
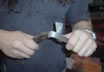
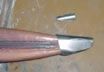
I mark the future holes for stitching
and drill them using a 2mm diameter bit. (Pictures 17 and 18)
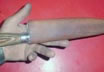
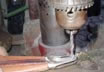
I saw the leather. (Pictures 19, 20 and 21)
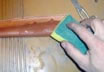
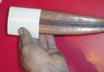
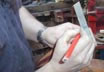
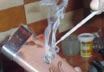
I get the sheath wet using a sponge and water. (Pictures 22
and 23)
I wrap the blade in saran wrap so it doesn't get moist. (Picture
24)
Picture 17
Picture 18
Picture 19
Picture 20
Picture 21
Picture 22
Picture 23
Picture 24
I wrap the blade in saran wrap
so it doesn't get moist. (Picture 24)
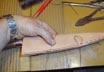
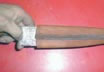
I place the knife inside the sheath. (Picture 25)
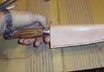
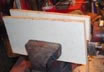
Then I press it between two flat pieces of wood to avoid marks on
the leather for about 2-4 hours. (Pictures 26 and 27)
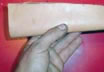
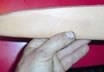
After the leather dried up. (Pictures 28 and 29)
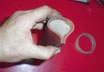
Making a paper mold of the belt clip (I recommend using paper as
it allows me to make several easy and inexpensive test on it and
pick up the most convenient one) (Pictures 30, 31 and 32)
Picture 25
Picture 26
Picture 27
Picture 28
Picture 29
Picture 30
Picture 31
Picture 32
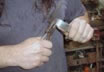
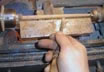
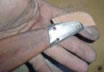
Making the clip draft on a 1.5mm
thick layer of stainless 304 (Pictures 33 and 34)
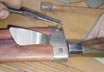
Clip draft. (Picture 35)
Bending the metal to match the contour of the sheath. (Pictures
36, 37, 38, 39 and 40)
Picture 33
Picture 34
Picture 35
Picture 36
Picture 37
Picture 38
Picture 39
Picture 40
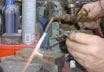
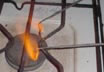
Welding both borders with an oxy-acetylene
torch. (Pictures 41 and 42)
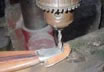
I get rid of the extra material on the welded part on the band sander.
(Picture 43)
After sanding. (Picture 44)
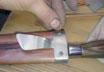
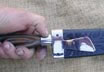
I place the clip on the leather sheath and make two holes on each
side. (Pictures 45 and 46)
I round a piece of hard wood (I used Guayacan for this one) til
it has 1/4" diameter. (Picture 47)
I place the wooden pegs to keep the clip in place. (Pictures
48 and 49)
Picture 41
Picture 42
Picture 43
Picture 44
Picture 45
Picture 46
Picture 47
Picture 48
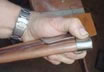
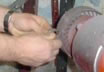
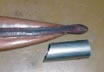
I cut a piece of stainless 304
pipe (1" diameter and 1.5mm thickness) (Pictures 50 and
51)
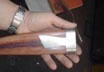
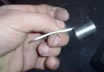
I cut off a piece to match the pipe to the tip of the sheath. (Pictures
52 and 53)
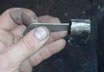
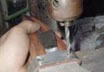
I repeat the drilling process I did on the clip on this piece. (Pictures
54 and 55)
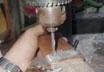
I add a leather piece to match my design so I can put the same wooden
pegs to the tip metal piece and secure it to the sheath. (Picture
56)
Picture 49
Picture 50
Picture 51
Picture 52
Picture 53
Picture 54
Picture 55
Picture 56
I drill the leather piece. (Picture
57)
With some metal piecs heated on the kitchen I mark the leather.
(Pictures 58 and 59)
I cover the metal parts with masking tape and then I use an aerograph
to dye the sheath black. (Picture 60)