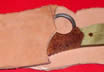
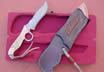
Ariel Salaverria Custom Knives Ariel Salaverria Custom Knives - San Mai and Cable Damascus Custom Knives - Knifemaking Tutorials
    Home | About Me | Tutorials | Knifemaking | Ordering | Contact | Newsletter  
  Available | Knives | Jewelry | EDC Tools | Lanyard Beads | Watch Buckles and Straps | Rings | Crosses | Hearts  
#23 - #22 - #21 - #20 - #19 - #18 - #17 - #16 - #15 - #14 - #13 - #12 - #11 - #10 - #9 - #8 - #7 - #6 - #5 - #4 - #3 - #2 - #1
 
#27 - #26 - #25 - #24
 

Knifemaking - Damascus Ringed Fighter - Sheath and Presentation Box
Sheath and presentation box for the Damascus Ringer Fighter.

Order Details:
No order details, I had free reign over the sheath and box.

Sheath making process
Drawing the contour to cut the leather. (Picture 1)

Cutting the leather. (Picture 2)

Punching the holes for the belt loop. (Picture 3)

Cutting the leather for the belt loop. (Picture 4)

Backside already cutted and punched for the belt. (Picture 5)

Glueing other layer of leather for extra thickness. (Pictures 6 and 7)

Drawing the shape of the blade for the front side of the sheath on paper to pass it later into leather. (Picture 8)
Knifemaking - Damascus Ringed Fighter Sheath   Knifemaking - Damascus Ringed Fighter Sheath   Knifemaking - Damascus Ringed Fighter Sheath   Knifemaking - Damascus Ringed Fighter Sheath   Knifemaking - Damascus Ringed Fighter Sheath   Knifemaking - Damascus Ringed Fighter Sheath   Knifemaking - Damascus Ringed Fighter Sheath   Knifemaking - Damascus Ringed Fighter Sheath
Picture 1   Picture 2   Picture 3   Picture 4   Picture 5   Picture 6   Picture 7   Picture 8
Presenting the paper mold into the leather to cut the blank. (Picture 9)

Front side of the sheath already cutted and presented over the backside. (Picture 10)

Drawing the exact contour of the blade on the leather to protect the stitches. (Picture 11)

Glueing the protective parts. (Pictures 12 and 13)

Simil blade drawing on the front side for an anaconda skin insert. (Picture 14)

Cutting the leather for the anaconda skin insert. (Picture 15)

Removed piece. (Picture 16)
Knifemaking - Damascus Ringed Fighter Sheath   Knifemaking - Damascus Ringed Fighter Sheath   Knifemaking - Damascus Ringed Fighter Sheath   Knifemaking - Damascus Ringed Fighter Sheath   Knifemaking - Damascus Ringed Fighter Sheath   Knifemaking - Damascus Ringed Fighter Sheath   Knifemaking - Damascus Ringed Fighter Sheath   Knifemaking - Damascus Ringed Fighter Sheath
Picture 9   Picture 10   Picture 11   Picture 12   Picture 13   Picture 14   Picture 15   Picture 16
Placing the anaconda skin insert into place. (Picture 17 and 18)

Marking the holes for the stitching. (Picture 19)

Making the holes for the stitching. (Picture 20)

Stitching the anaconda skin to the leather. (Picture 21)

Anaconda skin stitched to the leather. (Picture 22)

Adding another layer of leather to reinforce the sheath and protect the stitching for the Anaconda skin. (Picture 23)

Glueing the front part. (Picture 24)
Knifemaking - Damascus Ringed Fighter Sheath   Knifemaking - Damascus Ringed Fighter Sheath   Knifemaking - Damascus Ringed Fighter Sheath   Knifemaking - Damascus Ringed Fighter Sheath   Knifemaking - Damascus Ringed Fighter Sheath   Knifemaking - Damascus Ringed Fighter Sheath   Knifemaking - Damascus Ringed Fighter Sheath   Knifemaking - Damascus Ringed Fighter Sheath
Picture 17   Picture 18   Picture 19   Picture 20   Picture 21   Picture 22   Picture 23   Picture 24
Smoothing the contour of the sheath using a belt sander. (Picture 25)

Marking exact parallel lines to the contour for a proper and even stitching. (Picture 26)

Making the holes for the stitching. (Picture 27)

Drilling the holes for the stitching. (Picture 28)

Paper stencil for a metallic point. (Picture 29)

Paper stencil glued to the metal for an exact match. (Picture 30)

Metallic point ready to be drilled for future stitching to the sheath. (Picture 31)

Drilling the holes on the metallic point for the stitching. (Picture 32)
Knifemaking - Damascus Ringed Fighter Sheath   Knifemaking - Damascus Ringed Fighter Sheath   Knifemaking - Damascus Ringed Fighter Sheath   Knifemaking - Damascus Ringed Fighter Sheath   Knifemaking - Damascus Ringed Fighter Sheath   Knifemaking - Damascus Ringed Fighter Sheath   Knifemaking - Damascus Ringed Fighter Sheath   Knifemaking - Damascus Ringed Fighter Sheath
Picture 25   Picture 26   Picture 27   Picture 28   Picture 29   Picture 30   Picture 31   Picture 32
Metallic point, already drilled and etched in acid. (Picture 33)

Taking the metallic point out of the electrolitic coppering process jar. (Picture 34)

Coppered metallic point ready to be stitched to the sheath. (Picture 35)

I first dye the sheath with a brown base and then I use an aerograph to dye the borders and the back. (Picture 36)

Almost finished sheath, already dyed and with the metallic point stitched. (Picture 37)

Finished sheath. (Pictures 38 and 39)

Detail of the method to secure the knife in place for secure storage.The leather holders are tooled from rosewood and then dyed to the desired color. (Picture 40)
Knifemaking - Damascus Ringed Fighter Sheath   Knifemaking - Damascus Ringed Fighter Sheath   Knifemaking - Damascus Ringed Fighter Sheath   Knifemaking - Damascus Ringed Fighter Sheath   Knifemaking - Damascus Ringed Fighter Sheath   Knifemaking - Damascus Ringed Fighter Sheath   Knifemaking - Damascus Ringed Fighter Sheath   Knifemaking - Damascus Ringed Fighter Sheath
Picture 33   Picture 34   Picture 35   Picture 36   Picture 37   Picture 38   Picture 39   Picture 40

Box making process
I decided to make the box to show the both the knife and sheath on separated places.

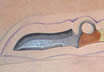
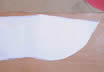
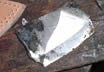
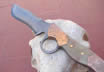
After drawing the contour of the knife, I drill some holes to help me later to use the vertical saw. I also did this on another piece of wood, but with the contour of the sheath. (Picture 41)

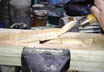
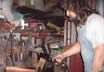
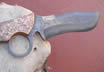
I saw the contour with the vertical saw. (Picture 42)

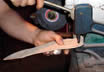
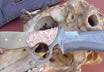
Carving the wood. (Pictures 43 and 44)

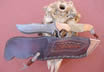
Adding hinges. (Picture 45)

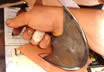
Sanding the box. (Picture 46)

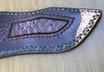
Box ready to be dyed. (Picture 47)

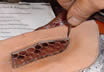
Dyeing the box with an aerograph. (Picture 48)

Knifemaking - Damascus Ringed Fighter Sheath   Knifemaking - Damascus Ringed Fighter Sheath   Knifemaking - Damascus Ringed Fighter Sheath   Knifemaking - Damascus Ringed Fighter Sheath   Knifemaking - Damascus Ringed Fighter Sheath   Knifemaking - Damascus Ringed Fighter Sheath   Knifemaking - Damascus Ringed Fighter Sheath   Knifemaking - Damascus Ringed Fighter Sheath
Picture 41   Picture 42   Picture 43   Picture 44   Picture 45   Picture 46   Picture 47   Picture 48

Painting with glue the cloth that will cover the inside of the box. (Picture 49)

Glueing process finished, cloth ready to be cutted to final shape. (Pictures 50 and 51)

Screwing the lock. (Picture 52)

Customer's initials in 3mm thick wire. (Pictures 53 and 54)

After heating the wire with a torch, I printed the initials on the box. The masking tape was placed to work as an exact guide for the letters. (Picture 55)

Box after splashing with with transparent polyurethane using an aerograph. (Picture 56)

Knifemaking - Damascus Ringed Fighter Sheath   Knifemaking - Damascus Ringed Fighter Sheath   Knifemaking - Damascus Ringed Fighter Sheath   Knifemaking - Damascus Ringed Fighter Sheath   Knifemaking - Damascus Ringed Fighter Sheath   Knifemaking - Damascus Ringed Fighter Sheath   Knifemaking - Damascus Ringed Fighter Sheath   Knifemaking - Damascus Ringed Fighter Sheath
Picture 49   Picture 50   Picture 51   Picture 52   Picture 53   Picture 54   Picture 55   Picture 56
Finished Knife, Sheath and Presentation Box
Damascus Ringed Fighter   Damascus Ringed Fighter   Damascus Ringed Fighter   Damascus Ringed Fighter   Damascus Ringed Fighter   Damascus Ringed Fighter   Damascus Ringed Fighter   Damascus Ringed Fighter
#23 - #22 - #21 - #20 - #19 - #18 - #17 - #16 - #15 - #14 - #13 - #12 - #11 - #10 - #9 - #8 - #7 - #6 - #5 - #4 - #3 - #2 - #1
 
#27 - #26 - #25 - #24
 
  Available | Knives | Jewelry | EDC Tools | Lanyard Beads | Watch Buckles and Straps | Rings | Crosses | Hearts  
    Home | About Me | Tutorials | Knifemaking | Ordering | Contact | Newsletter  
Subscribe to the Ariel Salaverria Custom Knives Newsletter AES Custom Knives - Copyright 2004-2022 - Website by NsB